Adventures in SiteSpect: Geotargeting for Seasonal Inventory
By Ruby Brown
April 24, 2019
Share
If you work with retail, you’re likely going to need to change your inventory seasonally — especially if you sell clothes, shoes, decor, outdoor equipment, or other seasonally dependent products. But unfortunately, there isn’t a universal date for when you should make the jump and start promoting the next season’s goods. And, who is to say that all your customers are going to want the new stuff at the same time?
With SiteSpect, using just the Visual Editor, you can easily update your site and then serve those updates only to certain user segments. For example, in April, it may make sense to feature summer clothes for customers in California, but to wait until May for those in Maine. In this blog, I’ll walk through how to take a clothing website from winter to summer, how to create a custom metric, and choose your specific audience.
Homepage Updates
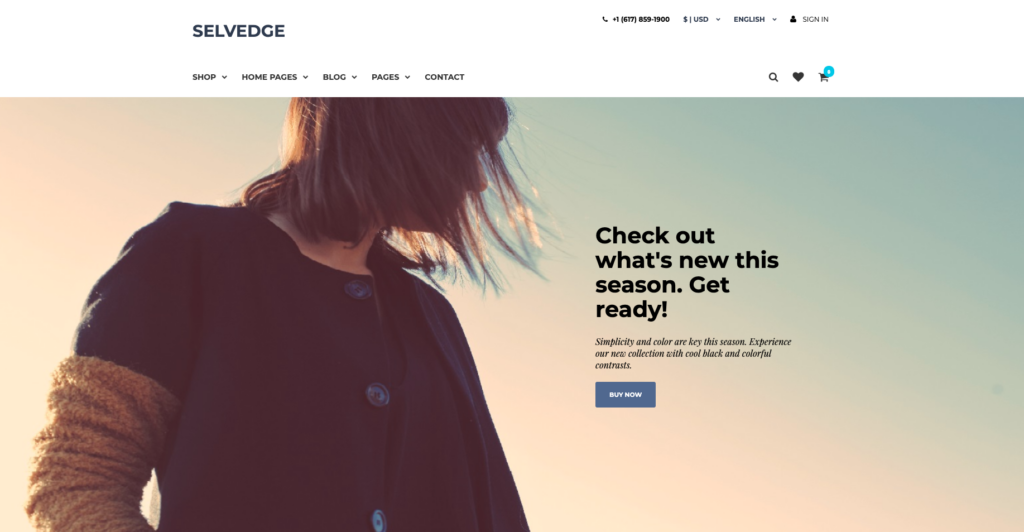
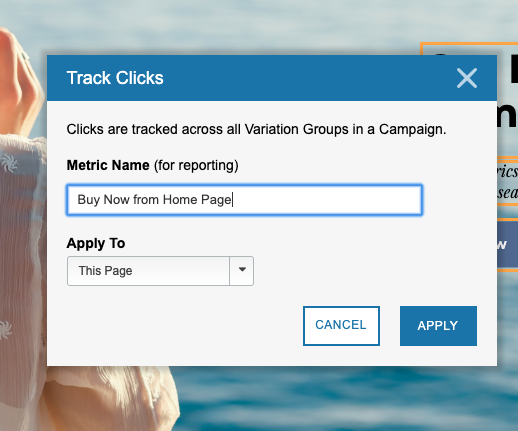
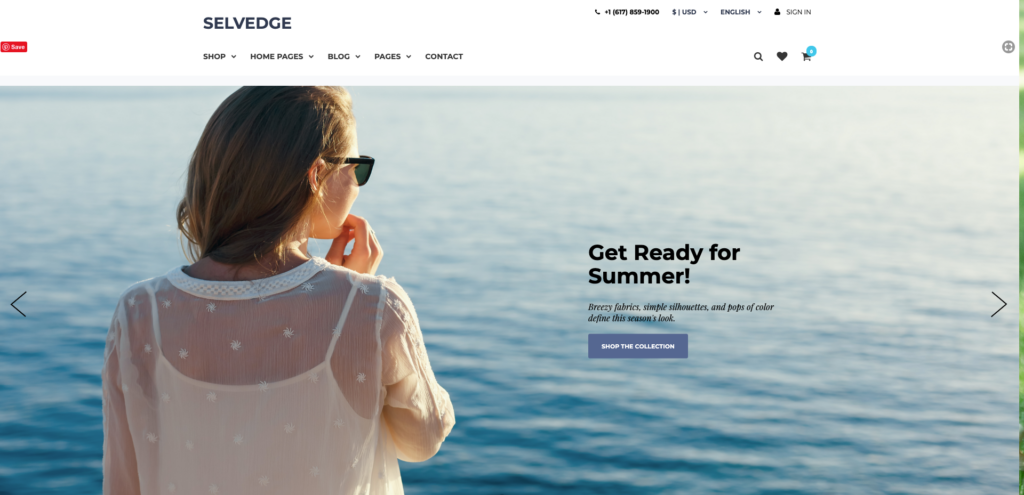
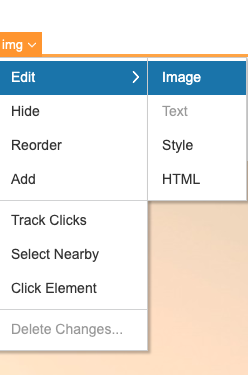
I started by updating the look on the homepage hero image and text. I had a new feature — summer clothes, and so wanted to highlight it. In Visual Editor you can click an element, edit image, and swap out one picture for another. Using the same process, I also changed the text on the homepage to this season’s message. There is a Call to Action (CTA) button on that same hero banner, and I wanted to track clicks just from that button. In Visual Editor, I just selected that element, chose “Track Clicks,” and named my new metric.
Product List Pages
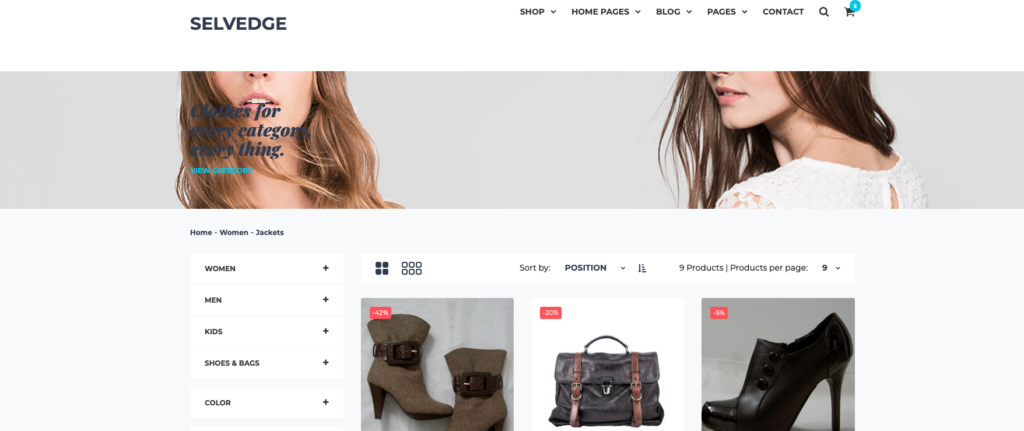
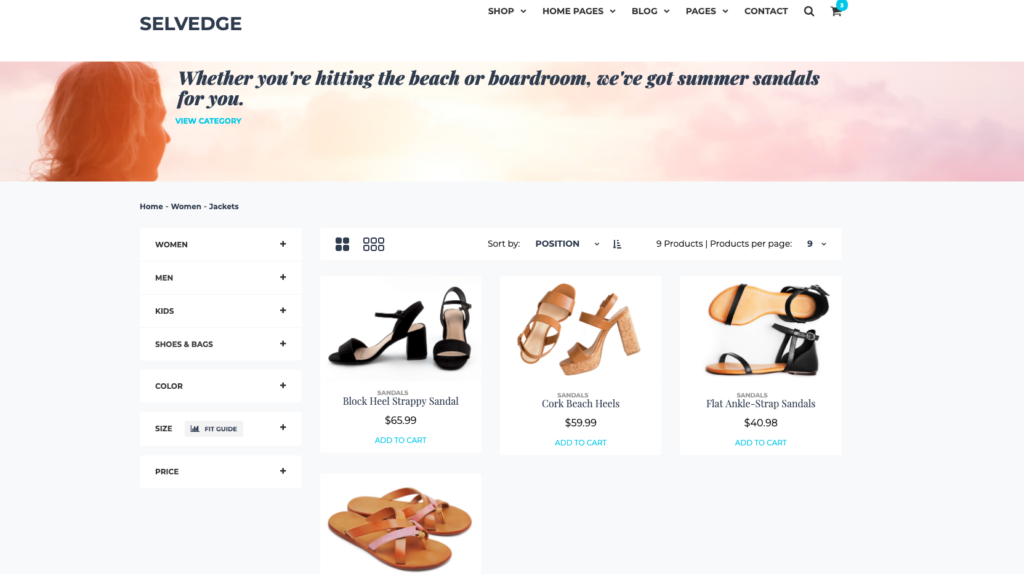
My product list pages also have a hero image with featured text, and so I updated those for the season as well, using the exact same process. You’ll notice in the slideshow below that I also updated the inventory to feature summer sandals. For this, you’ll need to do some work with whatever inventory system you use. However, if your inventory stays static, you can just swap the featured images using Visual Editor.
Metrics and Audiences
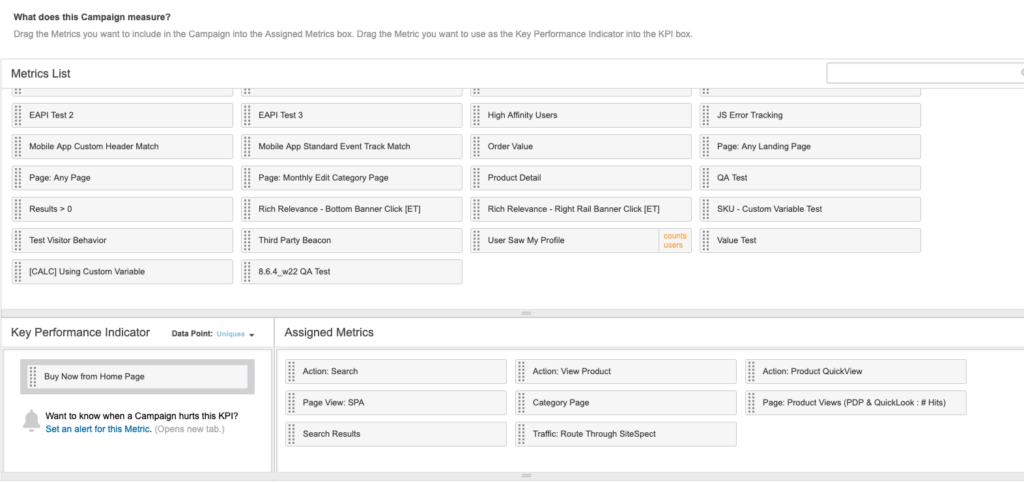
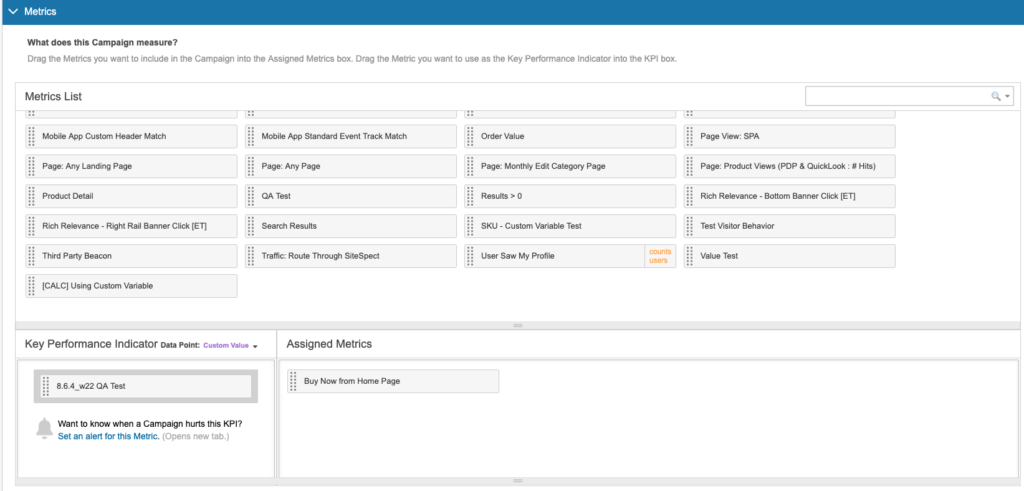
Now that the new site is looking the way I want it to, I’ll move into defining my KPIs and my Audiences. For this, you’ll exit the Visual Editor. When you get into your campaign, you’ll see areas for editing Metrics and Audiences. For this campaign my most important Metric is that one that I created, “Buy Now from Home Page.” However, I would still like to keep track of the rest of the Metrics listed above. Note that most advanced optimization specialists would recommend tracking anywhere from 20 – 40 Metrics — much more than I have in my example.
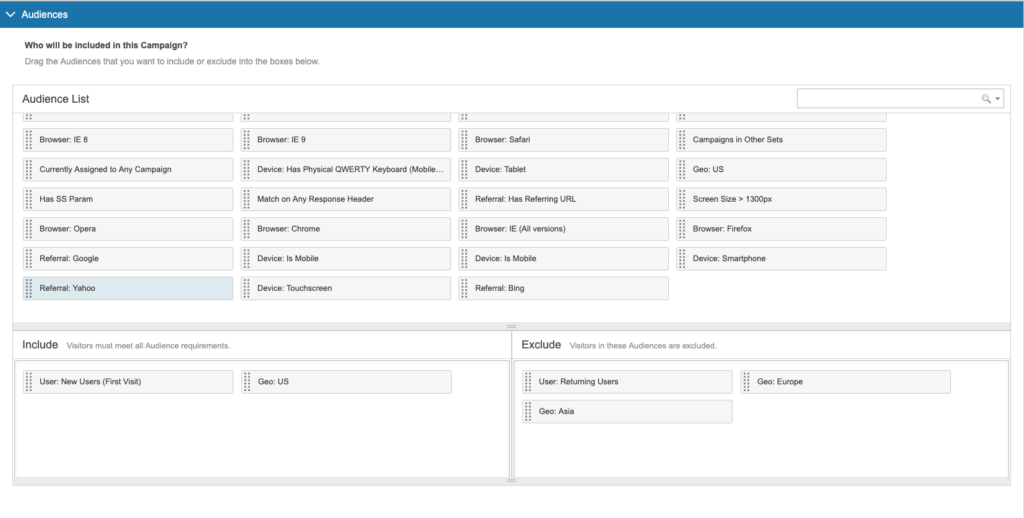
You select your audiences in the same way. In this A/B test I only wanted to include New Users based in the US. Everyone else will see the control variation. You might choose to show your variation only to Users in California, or in Europe. Or maybe you only want to customers on mobile devices to see the variations. You can simply drag and drop the audiences you want to target. Also note that you can create custom audiences based on unique triggers that you can then reuse on any number of campaigns.
Slideshow: Featuring Seasonal Inventory
Check out the slideshow for a step-by-step guide to the process.
- This is the existing website. I’ll making my changes from here.
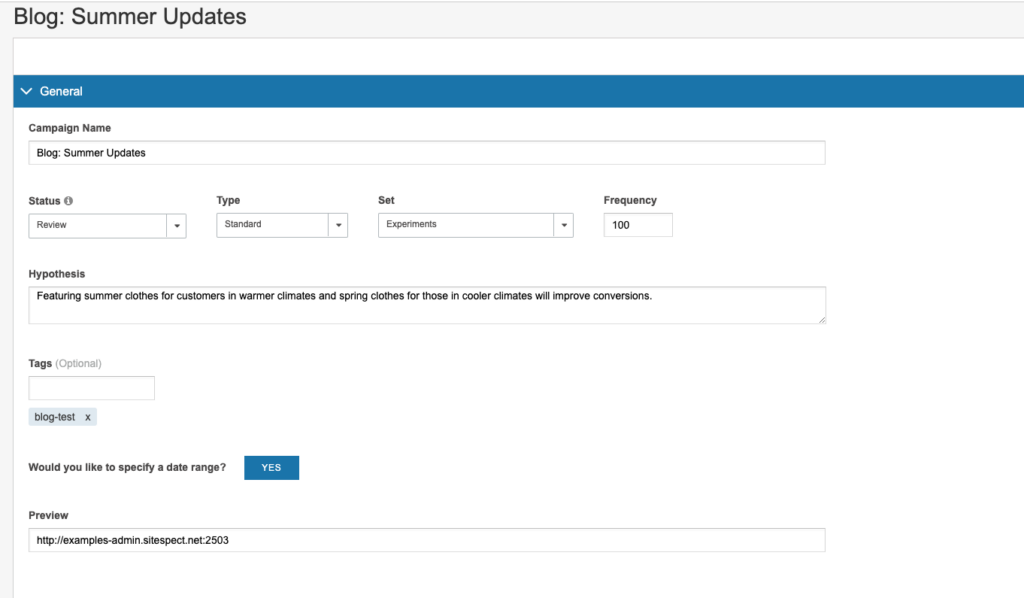
- I created a new A/B test, titled, and tagged it.
- Then I launched the Visual Editor.
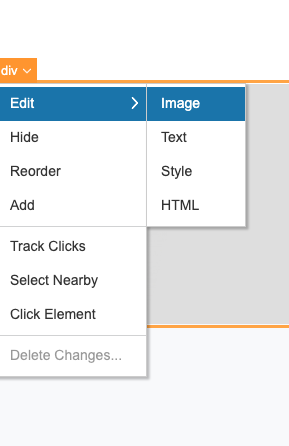
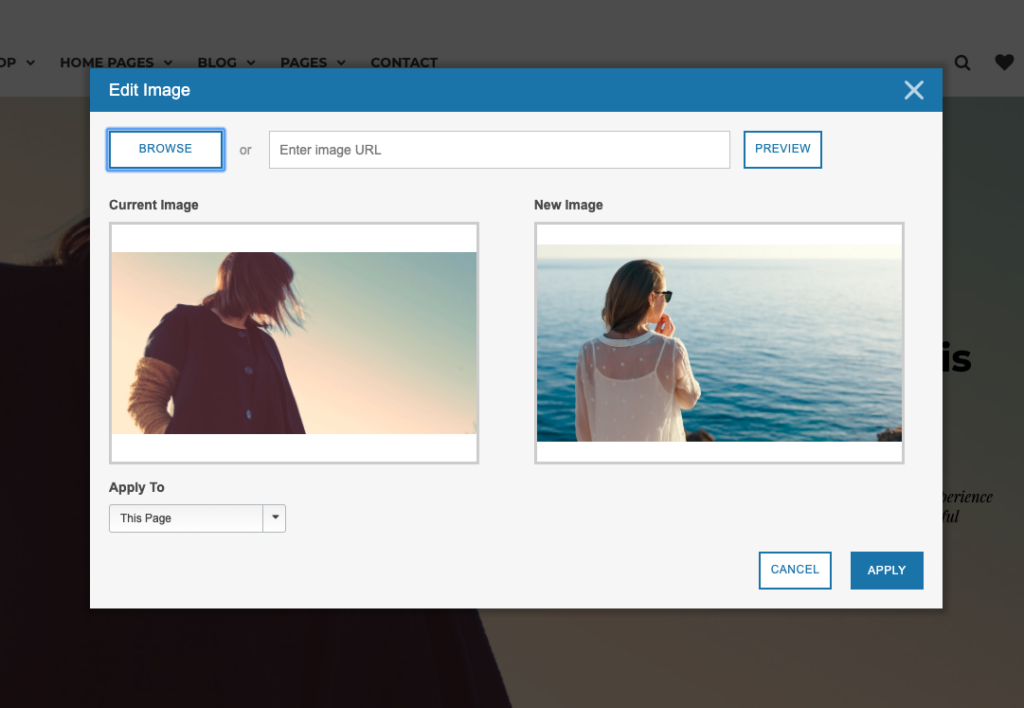
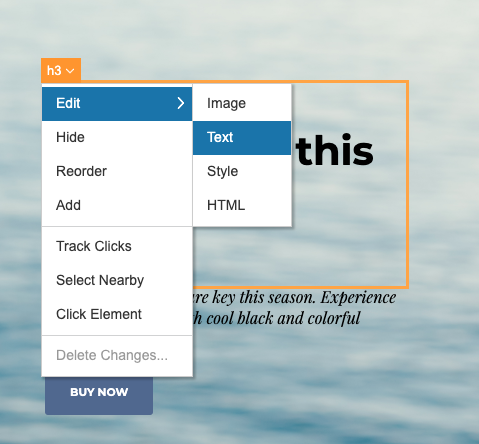
- My first step was to update the image on the homepage. I selected the element and went to Edit > Image.
- An image editing window will pop up, and you can upload your new image.
- I also changed the text on the hero image to match the new vibe.
- The homepage also has this “Buy Now” button, and I’d like to track clicks to this button after the change.
- I just clicked the “Buy Now” button element, and chose “Track Clicks.”
- Then you name your new metric!
- This is our new, summer homepage. (Note, I also changed the text on our CTA button. I did this the same way as the other text.)
- Now on to the Product List Page. This page, as you can see, also has a hero image and the text is very hard to read.
- Just like before, I edited the image, which also made the text easier to read.
- The new Product Landing Page! You’ll notice, I also updated the inventory to feature summer sandals. For this, you’ll need to do some work with whatever inventory system you use. However, if your inventory is staying the same you can swap out the featured images in Visual Editor, and very easily update product descriptions.
- This is where I’ll define my Metrics. My KPI (key performance indicator) is that “Buy Now” Metric I created.
- Then you’ll see this table to choose your audiences.
- I chose to serve this variation only to New Users in the US.
To learn more about SiteSpect, visit our website.
Share
Suggested Posts
Subscribe to our blog:
